Posts Tagged "flowers"
Egg Carton Flowers
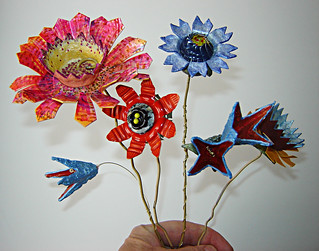 This Egg Carton Flowers craft is a great project around Easter or Mother’s Day for Brownie and Junior girls. It’s a great project for the girls to create small bouquets to give to their mothers, sisters, or anyone special to them. The colors of paint suggested make a nice light palette, but feel free to use different colors to coordinate with the holiday or season nearest to when you decide to do this project. It can be a bit messy, but can also easily be completed in a 30 minute troop meeting.
Want to share photos of your troop and finished projects? Contact Us!![]()
Materials Needed:
- Cardboard egg carton
- Acrylic Paint – Lemon Custard, Baby Pink, Parisian Pink, Jamaican Sea, Lilac Love, Bright Green
- Chenille stems, kelly green
- Pom poms, ¾”assorted colors
- Scissors
- Paintbrush
- All-purpose glue
- Paper towels
- Paper plates
- Antibacterial spray
- Clothespins
![]() Directions:
Directions:
- Cut egg cartons apart, giving you individual “egg cups” to craft with.
- Use scissors to shape flowers, cut slits and create leaves.
- Using the clothespin to hold your flower and leaves, paint as desired. Turn some of the egg cups upside down and glue to the center of another cup to create different sizes and looks.
- Combine colors and shapes. Layer flowers with 2 or more cups.
- Have an adult poke small holes in the bottom of the cups and insert the chenille stems through the hole for the stem. Twist end of stems inside the cup to hold; add glue if needed.
- Glue pom poms to center of flower.
- Glue leaf shapes to chenille stem. Let dry completely before handling.
![]() Safety Tips!
Safety Tips!
- Spray the egg cartons with antibacterial spray before using to ward off any harmful bacteria.
Colored Carnations
This is a perfect craft around any holiday or any time of year. The colors you choose to transform the carnations into can be themed to match holidays, events, ceremonies, or seasons. Darker colors will work best to color the carnations, but any color is worth a try! It’s simple and creative. It’s also a great science experiment for younger girls. This craft can be combined with other crafts, like making a plastic bottle vase or recycled glass vase.
![]() Materials Needed:
Materials Needed:
- White carnations
- Liquid food coloring
- Flower vases
- Water
![]() Directions:
Directions:
- Fill vase ¼ of water.
- Add about 15 drops of food coloring to the water in the vase (more if the vase is large and the shade looks too light).
- Trim about 1″ off of the stems at the bottom at an angular cut.
- Put a flower in the vase and let it sit for 24 hours.
![]() Safety Tips!
Safety Tips!
- Always have an adult cut the flower stems.
- Use non-toxic food coloring.
The best way to go about this, since it does take about 24 hours for the flowers to change color, is to set up the experiment during the meeting and have the girls take them home. Tell them to watch them and ask parents to take photos of the flowers the next day. At the following meeting, the girls can bring their flowers back if they’re still alive or bring in the photos to share their results.
This is a great craft when working on science badges or as a prelude to a scientific outing. The process of the water moving up the stem into the petals is known as cohesion. The process gets its name because water is considered a very cohesive or sticky substance, which means that water pulled up through the stem takes on a magnetic-like effect, pulling the water up. The tubes in the plant (also known as capillaries) are very small and thin.
Read More