Teaching Camping Hazards with GIANTmicrobes
![]()
 It’s almost time for Summer Camp! Which means there’s no time like the present to start teaching younger girls about the importance of insect repellent
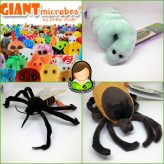
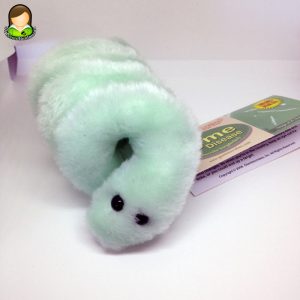
These fun plush toys are a million times larger than the actual organisms and cells that they represent. They are a tactile way to teach kids about health, their bodies, and their environment without complicated technical drawings. GIANTmicrobes was good enough to provide Girl Scout Guide with a plush mosquito, tick, and Lyme Disease in their original 5″ size complimentary to spread the message!
Mosquitoes!
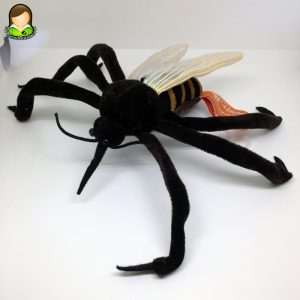 As I mentioned, these plush pests are 5″. They’re are 3,000 species of mosquito, but the most common are Culex pipiens. Only the females bite, sucking your blood like tiny vampires! Girls going off to camp need to know that they can get some nasty infections and viruses from mosquitoes, so regularly applying a good insect repellent is very important, for more than just avoiding itchy bites!
Mosquitoes can carry malaria, yellow fever, and West Nile Virus. Insect repellents with diethyltoluamide (DEET), lemon eucalyptus, or picaridin are the most effective to keep mosquitoes away while your girl is having fun on the lake with her new camp friends!
Ticks!
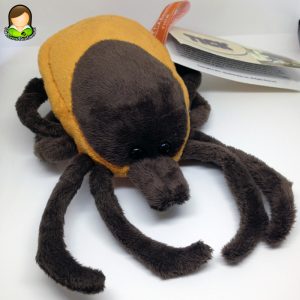 These slightly larger little vampires can be found in deep woods and grassy plains. Ticks can be as large as grapes or as small as a pinpoint, but all can carry diseases. Ixodes scapularis, their scientific name, are actually not insects, but arachnids more closely related to spiders. These little buggers can carry tularemia, Rocky-Mountain Spotted Fever, and most famously Lyme Disease.
Girls should always check for ticks after prolonged time in the woods, like camping in deep woods or a hike through. There is ample time to remove ticks before they can transmit these diseases. While there are many remedies floating around that involve heated pins, matches, or gasoline, all of these should be avoided as they can drive the tick further into the skin. The best method of removal is to grasp the tick with tweezers, as close to the skin as possible, flip it onto it’s back slowly (you don’t want to dislodge the “head”, or mouthparts, from the skin) and pull gently until it’s removed. Washing the area with alcohol
Lyme Disease!
 One of many diseases that can be transmitted by ticks, Lyme Disease is the most commonly reported tick-borne illness. This disease is initially identified with aches, fever, fatigue, and the signature bulls-eye shaped rash at the site of the tick bite. Antibiotics can help, however Lyme Disease is sometimes hard diagnose quickly as it can be misdiagnosed. This disease can lead to more problems later in life like arthritis, facial paralysis, meningitis, and more. Some victims of Lyme Disease can also develop cognitive issues like memory loss and mood changes.
Lyme Disease is diagnosed in approximately 300,000 people in the United States according to the Centers for Disease Control and Prevention. LymeDisease.org has published a Lyme Disease symptom checklist that all campers should be familiar with. All leaders and camp counselors should also be diligent with checking for ticks after extended periods of time outdoors and should know what to do if they find a tick to avoid this disease.
Each GIANTmicrobes toy comes with some facts about the microbe in the tag and their website has lots of information about the organism as well. All of these facts will help with teaching your girls about not just how important insect repellent or checking for ticks can be, but with their wide selection you can use these plushy germs to teach them all kinds of lessons!
Read MoreWoven Placemats
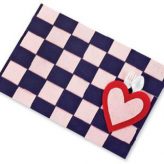
 These quick woven felt placemats are an easy craft that can even be done multiple times per year. These can be decorated with different colors and designs, not just hearts for Valentine’s Day, but Thanksgiving, Christmas, St. Patrick’s Day, and more!
Want to share photos of your troop and finished projects? Contact Us!
![]() Materials Needed:
Materials Needed:
- Scissors
- Ruler
- 2 Pink felt sheets
- 1 Purple felt sheet
- 1 Red felt sheet
- Aleene’s Original Tacky Glue
- Sponge
- Chalk

![]() Directions:
Directions:
- Start with a sheet of purple felt. Fold it in half.
- While the felt is still folded, draw a series of lines across the fold about 2″ apart. Do not draw them all the way to the edge – leave about ½” at the edge.
- Use chalk and the ruler to draw the lines before cutting the felt. Use a damp sponge afterward to wipe off the chalk once the mat is put together.
- Starting on the folded end of the felt, cut along all the lines. When you unfold the piece of felt, there should be ½” border that is uncut.
- Using a sheet of pink felt, cut strips about 2″ wide that are as long as the width of the purple felt.
- Lay the purple felt on a table so it’s lengthwise. Starting on the upper left corner, help the girls weave a pink strip down through the first slit, up through the second, down through the third, and so on through all the slits.
- Weave the second strip of pink through the purple so it alternates from the first strip. Make sure that each new piece of felt is pushed up next to the previously woven piece.
- Continue weaving strips in this way until there’s no room for any more strips.
- When you’re done weaving, secure each strip of woven felt using glue. You might also have to trim the woven edges a bit to make the edges of the place mat even.
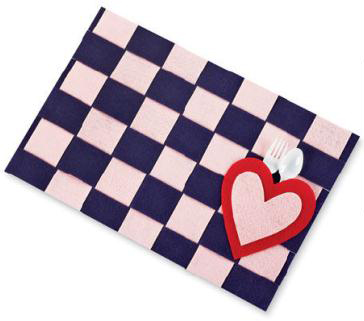
- Trace a heart onto the red felt, and then a smaller heart onto the pink felt, trying to keep the same basic shape of the heart. Cut out the pieces. Only glue the edge of the “v” of the larger heart onto the mat as shown. This will leave a pocket to hold the silverware. Glue the smaller heart onto the larger heart. Let dry before using your woven placemats!
![]() Safety Tips!
Safety Tips!
- Adult supervision is required at all times.
- Adults should handle the scissors and cutting when working with younger girls.
JGoode Halloween Coloring Pages
Used with permission from J. Goode
Illustrator Jen Goode of JGoode Designs, has put out another great color page for the upcoming holiday! Halloween is Monday and before it’s time to trick or treat, you can color! As well, a lot of meetings are on the weekend, so this can be a great last-minute activity for your meetings this weekend!
Download the coloring page here.
Read MoreSummer Key Chain & Necklace
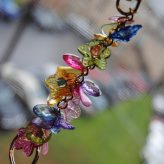
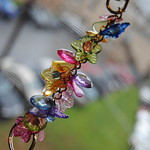 This Summer Key Chain & Necklace project is perfect to celebrate the coming of summer! You can easily customize it by finding beads or charms that reflect any of the activities your troop did over the summer. For example, if your girls went to summer camp, you could find wooden beads or a metal tree charm to attach to the end of the key chain.
Want to share photos of your troop and finished projects? Contact Us!
![]() Materials Needed:
Materials Needed:
- Alphabet beads
- Assorted summer-themed beads
- Plastic lacing
- Scissors
- Large plastic hooks


![]() Necklace Directions:
Necklace Directions:
- Thread large turtle bead onto necklace cord.
- Working on one side at a time, add a star then alphabet beads to spell “summer”. Add another star, contrasting bead, and another star.
- On the opposite side, add a star then alphabet beads to spell “rocks”, using a heart bead as the “o”. Add another star, contrasting bead, and another star.
- Tie off the cord at the ends.
![]() Keychain Directions:
Keychain Directions:
- Cut a 12″ piece of stretch lacing. Fold it in half and place the folded end through the hole at the bottom of the plastic hook, bringing the ends through the look creating a “larks head” knot onto the keyring.
- With the cords together, slide on a silver bead, palm tree bead, and another silver bead.
- Separate the cords and ad beads as desired to personalize the key chain with a name, troop number, camp name, unit, or anything else you want!
- Bring both sides together again and add a silver bead, a sun bead, and another silver bead.
- Tie the ends together and trim the excess cording.
![]() Safety Tips!
Safety Tips!
- Adult supervision is required when using scissors.
Ziggety-Zag Bracelets
 Ziggety-Zag Bracelets are great quick projects to start at a meeting and let girls finish at their own leisure at home. Please refer to the Friendship Bracelet Knots page for instructions on how to make the knots mentioned below.
Want to share photos of your troop and finished projects? Contact Us!
![]() Materials Needed:
Materials Needed:
- 4 colors of craft thread
- Masking tape or safety pins
- Ruler or measuring tape
- Scissors
![]() Directions:
Directions:
- Cut 4 colors of craft thread to 65″ lengths.
- Fold strands in half together, make a loop and knot at the top. Tape or pin the knot to your workstation.
- Arrange the color strands: A,A,B,B,C,C,D,D.
- Starting with strand A on the left, make 7 left-hand knots. A onto A, A onto B, etc.
- Continue making left hand knots with each strand until you come to the last D strand.
- With the last D strand, make 6 left-hand knots and one left-right knot.
- Starting with the right D strand, make 7 right-hand knots. Continue making 7 right-hand knots with each of the strands on the right until you get to the last A strand.
- With the last A strand, make 6 right knots and one right-left knots.
- Using the same A strand, make 6 left-hand knots.
- Repeat from step 4 until you have reached your desired bracelet length.
- Once the bracelet is long enough, tie a knot at the end, leaving a 4″ tail and trim.
- Wrap the bracelet around your wrist and tie the tail end to the looped end.
![]() Safety Tips!
Safety Tips!
- Only older girls should use the safety pins to secure the starting end of the bracelet.
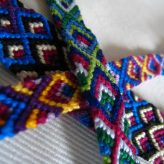
5 Color Chevron Bracelets
This 5 Color Chevron Bracelet is a great craft to start at a short meeting and let the girls take home to finish later. Please refer to the Friendship Bracelet Knots page for instructions on how to make the knots mentioned below.
Want to share photos of your troop and finished projects? Contact Us!
![]() Materials Needed:
Materials Needed:
- 5 colors of craft thread
- Masking tape or safety pins
- Ruler or tape measure
- Scissors
![]() Directions:
Directions:
- Cut two 65″ lengths of each color for 10 strands total.
- Even out all the strands and together, fold all in half to form a loop at the top and knot. Pin together or tape the loop to your work surface.
- Arrange the strands in mirror order for these colors: A,B,C,D,E – E,D,C,B,A.
- Start on the right with strand A. Working towards the center, make four right-hand knots: A onto B, A onto C, etc. Stop at the center.
- With strand A from the left side, make 5 left-hand knots. A onto B, A onto C, etc. The fifth knot should join the 2 middle strands together. Your color order should now be B,C,D,E,A – A,E,D,C,B.
- Repeat steps 4 and 5 until the bracelet is the desired length.
- Once the bracelet is long enough, tie a knot at the end, leaving a 4″ tail and trim.
- Wrap the bracelet around your wrist and tie the tail end to the looped end.
![]() Safety Tips!
Safety Tips!
- Only older girls should use the safety pins to secure the starting end of the bracelet.