Posts Tagged "Fiskars"
Stadium Pillows
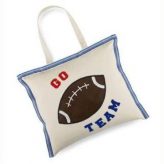
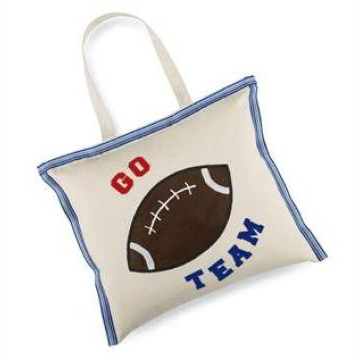 Stadium pillows are a fantastic project for any troop of any age. While my directions mention a football design, you can customize it for any sport and use any combination of colors to represent either professional, local teams or the girls’ school colors. The project is designed to be glued together, but if your girls are older you could easily alter the directions to sew the seams of the stadium pillows instead of glue.
Want to share photos of your troop and finished projects? Contact Us!
![]() Materials Needed:
Materials Needed:
- Large white tote bag
- Iron on letters in team colors
- Tulip Dimensional Fabric Paint – Slick White and Slick Brown
- Black fabric marker
- Ribbon of choice in team colors
- Poly-fil or pillow form
- All-Purpose glue
- Iron
- Scissors
- Pencils
- Paintbrush
- Paper Towels
- Paper Plate

![]() Directions:
Directions:
- Reference this post from Scrapbooking.About.com for a football pattern.
- Cut the tote bag along the side to open.
- Cut one handle from the bag.
- Draw a football with the pencil in center of tote.
- Have an adult follow the directions on the letters and iron the letters onto the tote to say “Go Team”.
- Pour out a small amount of the brown and white paints onto a paper plate. Use a paintbrush to fill in the football design and let dry. Use white to make side and center lines.
- Using white slick paint bottle, draw stitch marks on the ball. Let dry.
- Glue sides of tote together, let dry.
- Fill opening with pillow form or Poly-fil and glue closed.
- Glue ribbon along sides and top of tote.
![]() Safety Tips!
Safety Tips!
- Adults only should handle the iron and iron on the lettering.
- Adult supervision is required.
Felt Change Purse
This Felt Change Purse is a fun project for Junior and Cadette scouts who are older than the interest of most craft projects, and old enough to be trusted with a needle. This project takes 1-2 hours to do, depending on how adept the girls are with a needle and thread. Of course, you can split this into two meetings with doing the cutting & prep work in one meeting and the actual assembly of the purses in another. There’s a great video on how to do the blanket stitch mentioned:
Want to share photos of your troop and finished projects? Contact Us!
![]() Materials Needed:
Materials Needed:
- Floss #907
- Large eye needle
- Felt – black, purple, turquoise, gold, & pink
- 1″ sticky velcro
- 2 daisy brads
- Tacky glue
- Straight pins
- Fabric die cut machine
- Scissors
![]() Directions:
Directions:
- Cut black felt square in half to 6×9″.
- Fold up 3¾” and pin in place.
- Thread needle with floss & use blanket stitch to stitch up sides.
- Fold down flap 1¼”, press with finger to crease.
- Center sticky Velcro under flap & attach to purse & flap.
- Use Revolution to cut out flowers & leaves from felt.
- Attach with tacky glue and daisy brads.
![]() Safety Tips!
Safety Tips!
- Adult supervision is required when girls are using scissors and needles.
Personalized Ribbon Keychain
Personalized Ribbon Keychains are an all-ages project, suitable for both young girls and still a fun, quick project for older girls. These instructions on aimed more for younger girls, but older girls can easily also do this project with access to more craft supplies to snazzy up their key chains a bit more. This can easily be done in 30 minutes and is very clean, as long as the fabric paint is kept under control by younger girls.
Want to share photos of your troop and finished projects? Contact Us!
![]() Materials Needed:
Materials Needed:
- Fabric paint
- Split rings
- Ribbons – 28″ of one and 4″ of another.
- Scissors
- Ruler
- Pencils
- Craft glue
![]() Directions:
Directions:
- Cut a piece of ribbon 28″ long and two coordinating pieces 2″ long.
- Slip the key ring onto the long piece of ribbon. Fold it in half over the key ring and glue the ends together.
- Use the small pieces of ribbon to wrap around and glue over the seam of the other ribbons.
- Lightly draw the name onto the ribbon.
- Use the dimensional fabric paint to personalize and let dry.
![]() Safety Tips!
Safety Tips!
- Adult supervision is required.
Pinwheels
This is a great project for younger girls, as the pinwheels work pretty well but older girls might be a bit disappointed that they don’t work perfectly but they’re still awesome! That doesn’t really matter since, in my experience, pinwheels are really a toy more suited for younger girls anyway. You can spice up the project and colors by getting a pack of assorted colored drinking straws instead of plain white ones. The best straws are straight and not the kind with the bend in them.
Want to share photos of your troop and finished projects? Contact Us!
![]() Materials Needed:
Materials Needed:
- White construction paper
- Crayons, colored pencils, or markers.
- Plastic drinking straws
- Scissors
- Pencils
- Brass paper fasteners
- Pinwheel pattern.
![]() Directions:
Directions:
- Print the pinwheel pattern. You can reproduce this pattern on white construction paper with a copy machine. Be sure to cut the construction paper to 8½ in. by 11 in. You can also print the pattern out onto thicker colored paper directly.
- Cut out the pattern along the solid lines.
- Decorate the un-folded paper. Stickers might not work so well due to the folding and aerodynamics, but any other crayons, colored pencils, or markers should be fine for decorations.
- Cut the dotted lines from the four corners to the center circle, doing your best not to cut into the center circle.
- Use the sharpened pencil to poke a hole through the four tiny dark circles. The pencil point also works well to poke a hole into the straw, though you can also have an adult use a nail or a very small diameter hole punch. Carefully push the pencil point through the straw about ½” inch from the top.
- Make the tiny holes on the four points meet at the center circle.
- Push the brass fastener ends through the holes on the pinwheel. then push the fastener through the center circle.
- Place the straw on the back side of your pinwheel and push the ends of the fastener through the hole in the straw. Open-up the fastener by flattening the ends in opposite directions.
![]() Safety Tips!
Safety Tips!
- Adults should always make the holes when using a sharp object and working with younger girls.
- DO NOT allow the girls to punch holes with a nail if that’s the only implement you have.
- Adult supervision required when younger girls are using scissors.
![]() Quick Shopping for This Project
Quick Shopping for This Project
- Pacon Corporation Tru-Ray Construction Paper 9″x12″ White
- Crayola® Crayons – 64 Ct.
- Crayola® Classic Broadline Markers – 10 ct.
- Crayola Colored Pencils – 64ct.
- ACCO(R) Round-Head Solid Brass Fasteners, No. 4R, 1in., Box Of 100
- Drinking Straws
- Fiskars Creative Works Comfort Grip 7″ Scissors
God’s Eyes
I wish I knew of a non-religious name for this craft, but this is what they’ve always been referred to as long as I’ve known how to do them. The project originates in Mexico and Bolivia and is known in Spanish as Ojo de Dios, which translates to God’s Eyes. These can be used as decoration anywhere or even ornaments for a Christmas tree during the holidays. The way I’ve written the directions, you’ll have to tie off colors to switch cleanly between them, but in the Quick Shopping links at the bottom I’ve found some multicolor skeins of yarn. These types of yarn vary throughout the skein in different colors, so that might be an interesting way to vary the color but avoid the tie off of the different colors. It’s a handy trick when you don’t have a lot of time to complete the project or when working with younger girls who might not have the patience or dexterity to tie off between colors.
Want to share photos of your troop and finished projects? Contact Us!
![]() Materials Needed:
Materials Needed:
- 2 small, straight sticks about 5″ long OR 2 craft sticks
- Scissors
- Pencil
- 1-3 skeins of yarn in various colors
![]() Directions:
Directions:
- Cross the sticks at the center. Tie them together with the end of a piece of yarn, making an X, but don’t cut the yarn off its skein. Tie the yarn IN BACK of the 2 crossed sticks.
- With the pencil, number the sticks at the ends, in the center. This isn’t necessary, but will make these directions much easier to follow.
- Bring the yarn to the front between sticks 3 and 4. Pull the yarn over stick 3 and the next one too (stick 2), and bring it to the back between sticks 2 and 1. Wrap it behind stick 2 and bring it to the front again between sticks 2 and 3. Pull it over stick 2 and the next one too (stick 1), and wrap it behind stick 1.
- Pull the yarn over stick 1 and the next one too (stick 4) and wrap it behind stick 4. Pull it over stick 4 and the next one too (stick 3) and wrap it behind stick 3. This is one complete round. Always lay the yarn next to, NOT on top of the yarn already in place.
- Keep on wrapping the yarn behind each stick, over that stick and the next, and around behind that one, then over that stick and the next and behind that one. As you continue making the rounds, always be sure that the yarn lies next to, but never on top of the yarn in the previous round. After the first few rounds, you will see the woven pattern of the “eye” beginning to form.
- When you have an “eye” in one color of yarn, you can cut the yarn and tie on another color, and continue weaving. Make sure that the knot that you joined the 2 colors with, stays in the back.
- Keep weaving the “God’s Eye” until you are about ½” from the ends of the sticks. Cut the yarn, leaving approximately a 7-8″ tail. Tie the tail in a knot in back.
This diagram from About.com should help:
![]() Safety Tips!
Safety Tips!
- This is an all-ages project, but adult supervision is required of younger girls when using the scissors.